

@omail.sh addresses. With a custom domain you can use any domain you own — for example agent@yourdomain.com.
How it works
- Add your domain in the dashboard or via the API
- OpenMail returns the DNS records you need to set
- Publish them. The domain verifies automatically once DNS is live
- Create inboxes on it by passing the domain when you create an inbox
Adding a domain
Open Domains in the console, enter the domain you want to use (e.g.mail.acme.com) and click Add domain. You can also add it with POST /v1/domains.
You can use a subdomain like
mail.acme.com or an apex domain like acme.com. A subdomain is generally easier to configure without affecting other email on your domain.DNS records
The domain page lists every record with a copy button for the host and the value. Each row turns green as the record is found.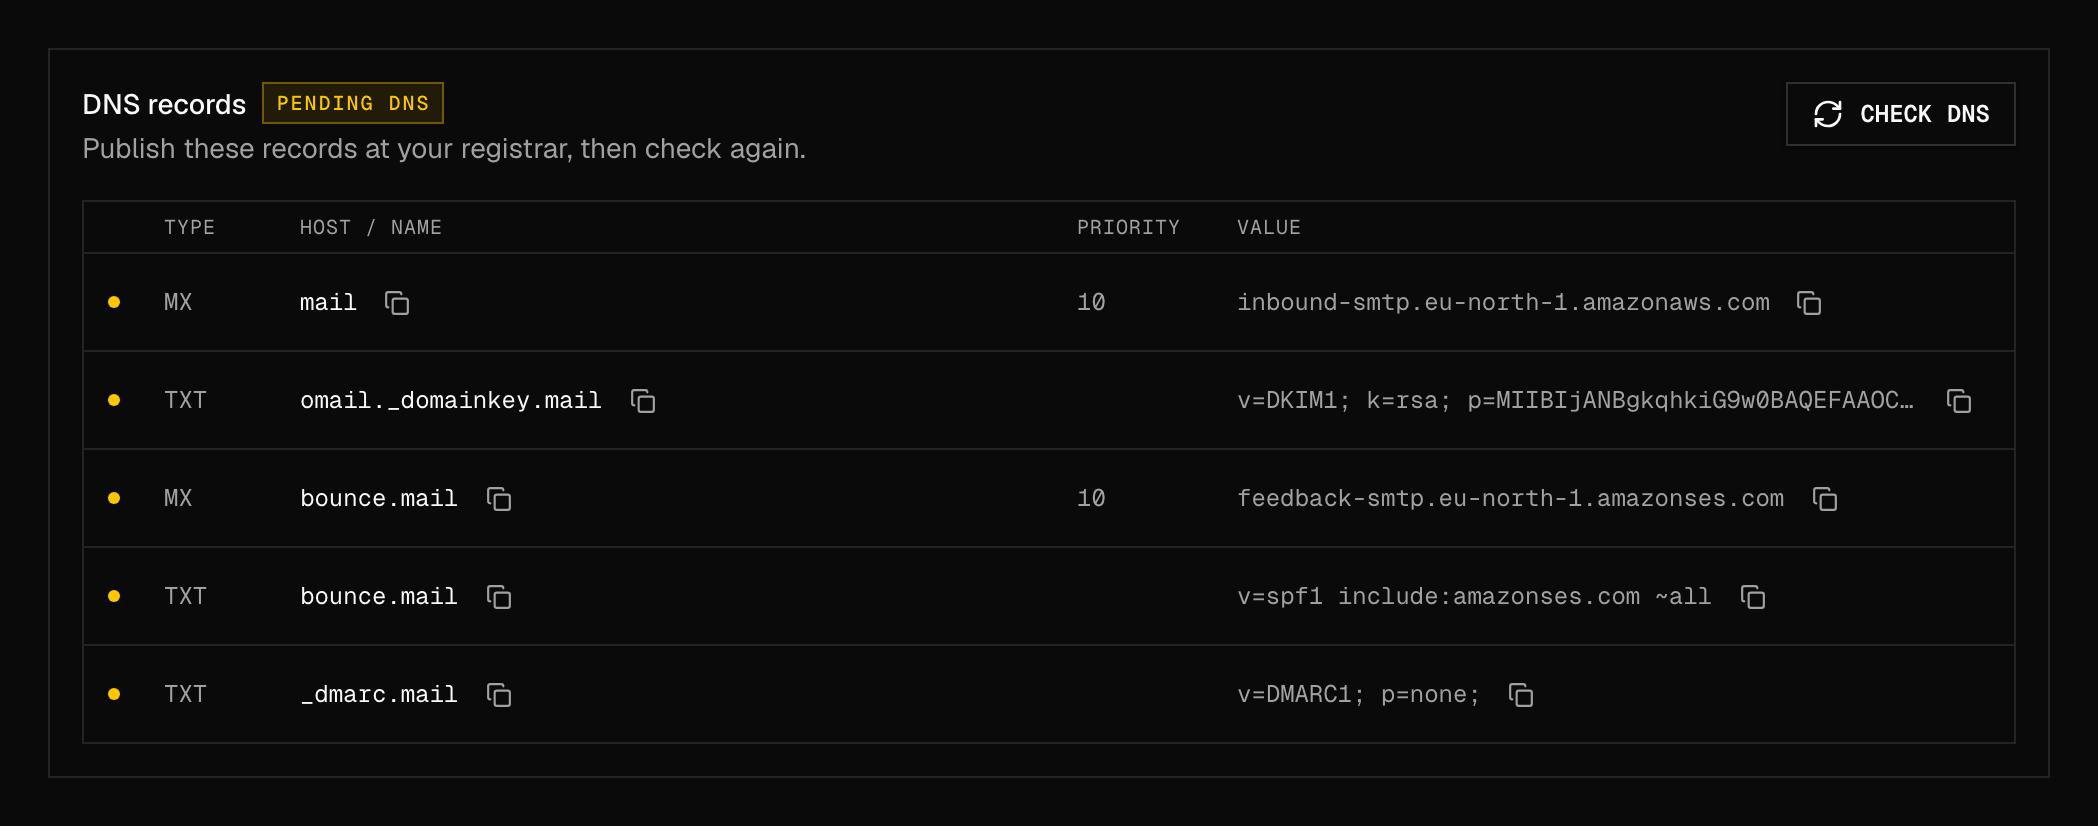
DNS records for a newly added domain, waiting on DNS
Always prefer the exact records shown in the dashboard or API after you add the domain — those values are authoritative.
MX record on your domain routes inbound email to OpenMail.
DKIM record is a single TXT on
omail._domainkey. It adds a cryptographic signature to outbound email, proving messages were sent by you. The public key is unique per domain and provided after you add it. Copy the whole value; a truncated key fails verification.
MAIL FROM records (bounce MX + TXT) set the envelope sender on your domain so SPF can align. Publish both on the bounce host exactly as shown — do not put the SPF include on your apex unless the records tell you to. Merge the SPF include into any v=spf1 record you already have; two SPF records on the same host are invalid.
DMARC record tells receivers what to do with mail that fails SPF or DKIM. Google and Yahoo require bulk senders to publish one. The default p=none; satisfies the requirement without affecting delivery; tighten to quarantine or reject once SPF and DKIM are aligned. If your domain already has a _dmarc record, keep it rather than replacing it. See SPF, DKIM, DMARC.
DNS changes typically propagate within minutes but can take up to 48 hours.
Verifying your domain
You don’t need to click Check DNS. Once the records are published, OpenMail checks them in the background and the domain becomes Verified within a couple of minutes. Click Check DNS only if you want to check sooner.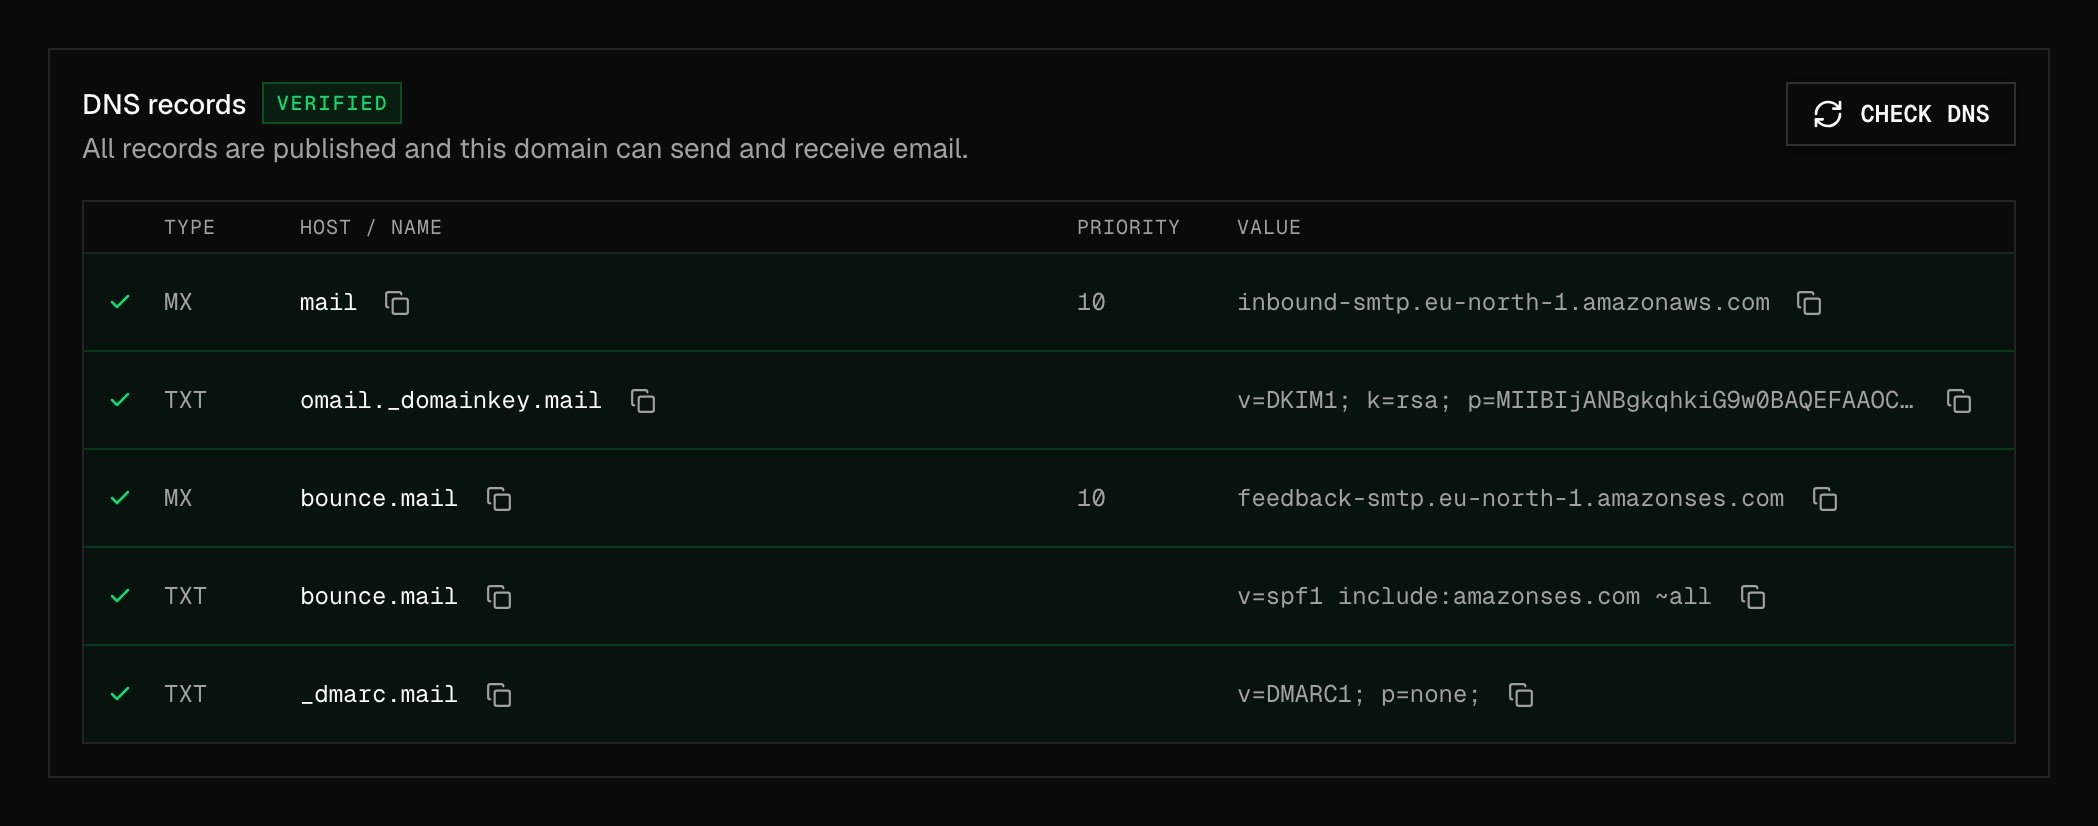
All records found — the domain can send and receive
DMARC is your own published policy, so it is not checked during verification — a domain verifies without it. The record is shown because bulk-sender requirements expect one.
- Existing MX records on the domain that weren’t replaced
- MAIL FROM MX or SPF published on the apex instead of
bounce - DKIM value truncated, or a host copied without the subdomain suffix
- Two
v=spf1TXT records on the same host (only one is allowed — merge includes into a single record)
Using your domain
Once a domain shows as Verified, it is ready to use — there is no separate activation step. Verifying the domain is what makes it available. Your account default domain never switches automatically. To create an inbox on your custom domain, choose it explicitly:domain, the inbox is created on your account default domain (@omail.sh). Passing a domain that is not verified, does not belong to your account, or is scoped to a different pod returns invalid_domain.
Pod scoping
Custom domains can be shared across your account or limited to a single pod:
When adding a domain, pick All pods or a specific pod. On a pod’s detail page, the Domains tab lists domains scoped to that pod; account-wide domains still appear when creating inboxes inside the pod.
To change scope later, open the domain’s page in the console and click Change next to “Available to …” (also under the ⋯ menu), or call
PATCH /v1/domains/{id} with podId (a pod id, or null for all pods). From the CLI: openmail domain update --domain-id <id> --pod-id <pod_id> or --all-pods. DNS records and verification are untouched.
Making a domain account-wide always works. Narrowing it to one pod only works if every inbox on that domain is already in that pod. Inboxes cannot move between pods, so if some live elsewhere the change is refused and the response tells you how many and what to do: delete those inboxes first, or keep the domain available to all pods. Scope changes need an account-wide API key.