> ## Documentation Index
> Fetch the complete documentation index at: https://docs.openmail.sh/llms.txt
> Use this file to discover all available pages before exploring further.
# MCP server
> Connect Claude, Cursor, or any MCP client to OpenMail. One hosted URL gives your agent an inbox so it can read, send, and reply to email.
Add one URL to your client. Your agent can then create an inbox, read threads, and reply. OAuth or API key; nothing to install.
## Connect
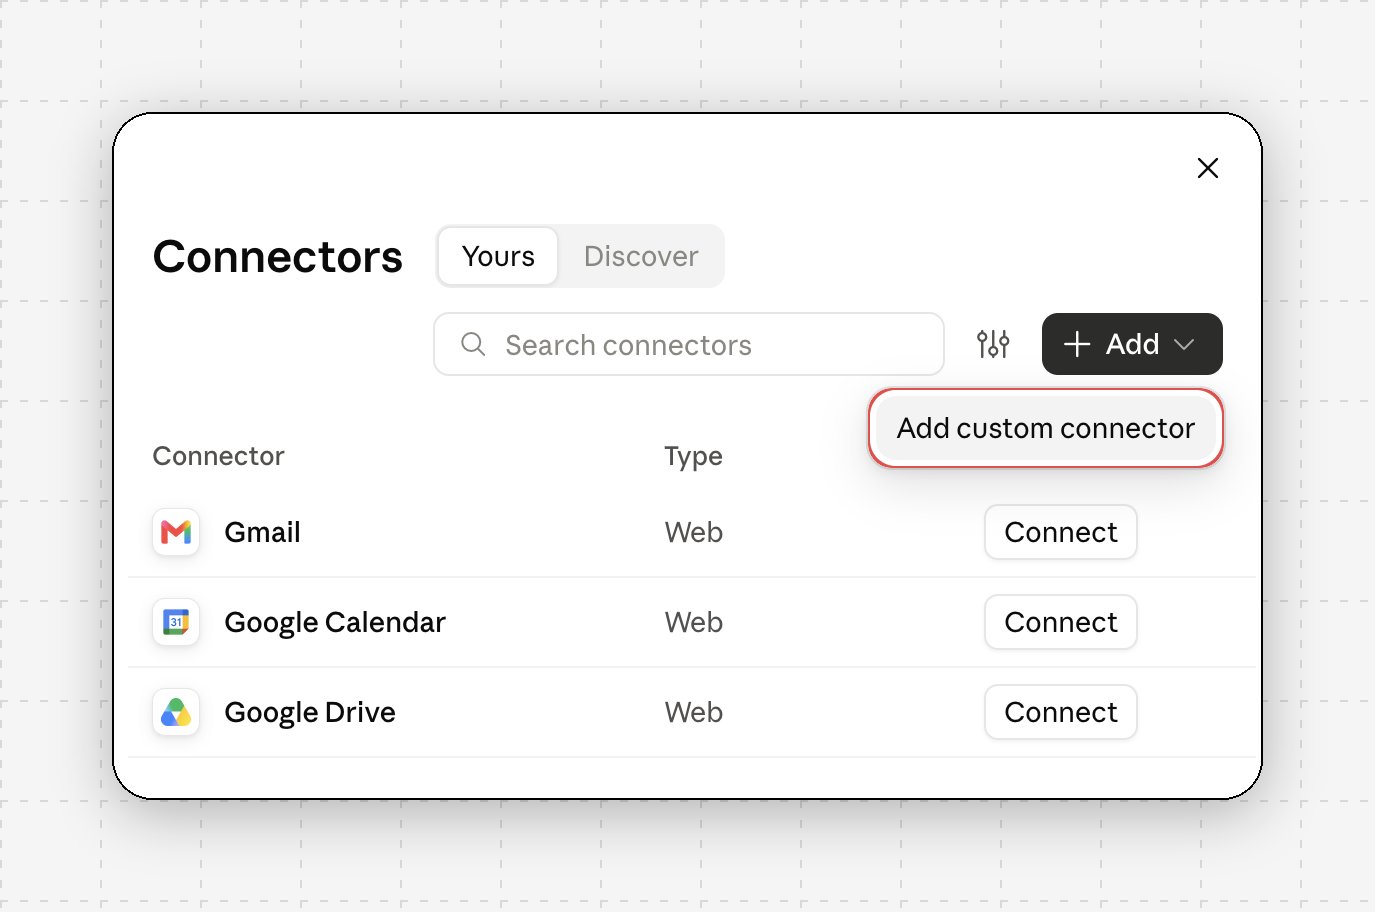
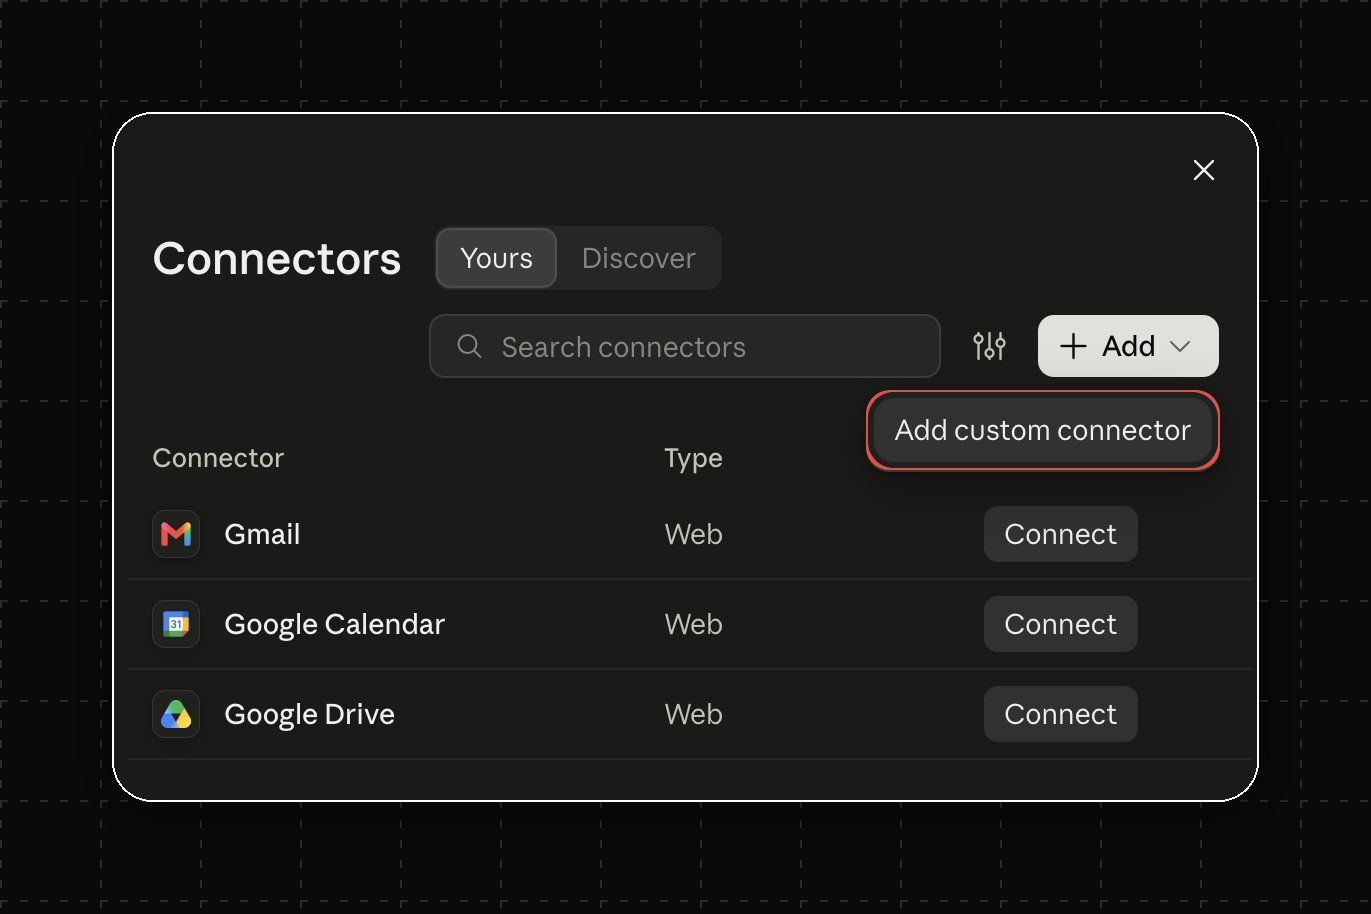
Go to **Settings → Connectors**, click **Add**, then **Add custom connector**.
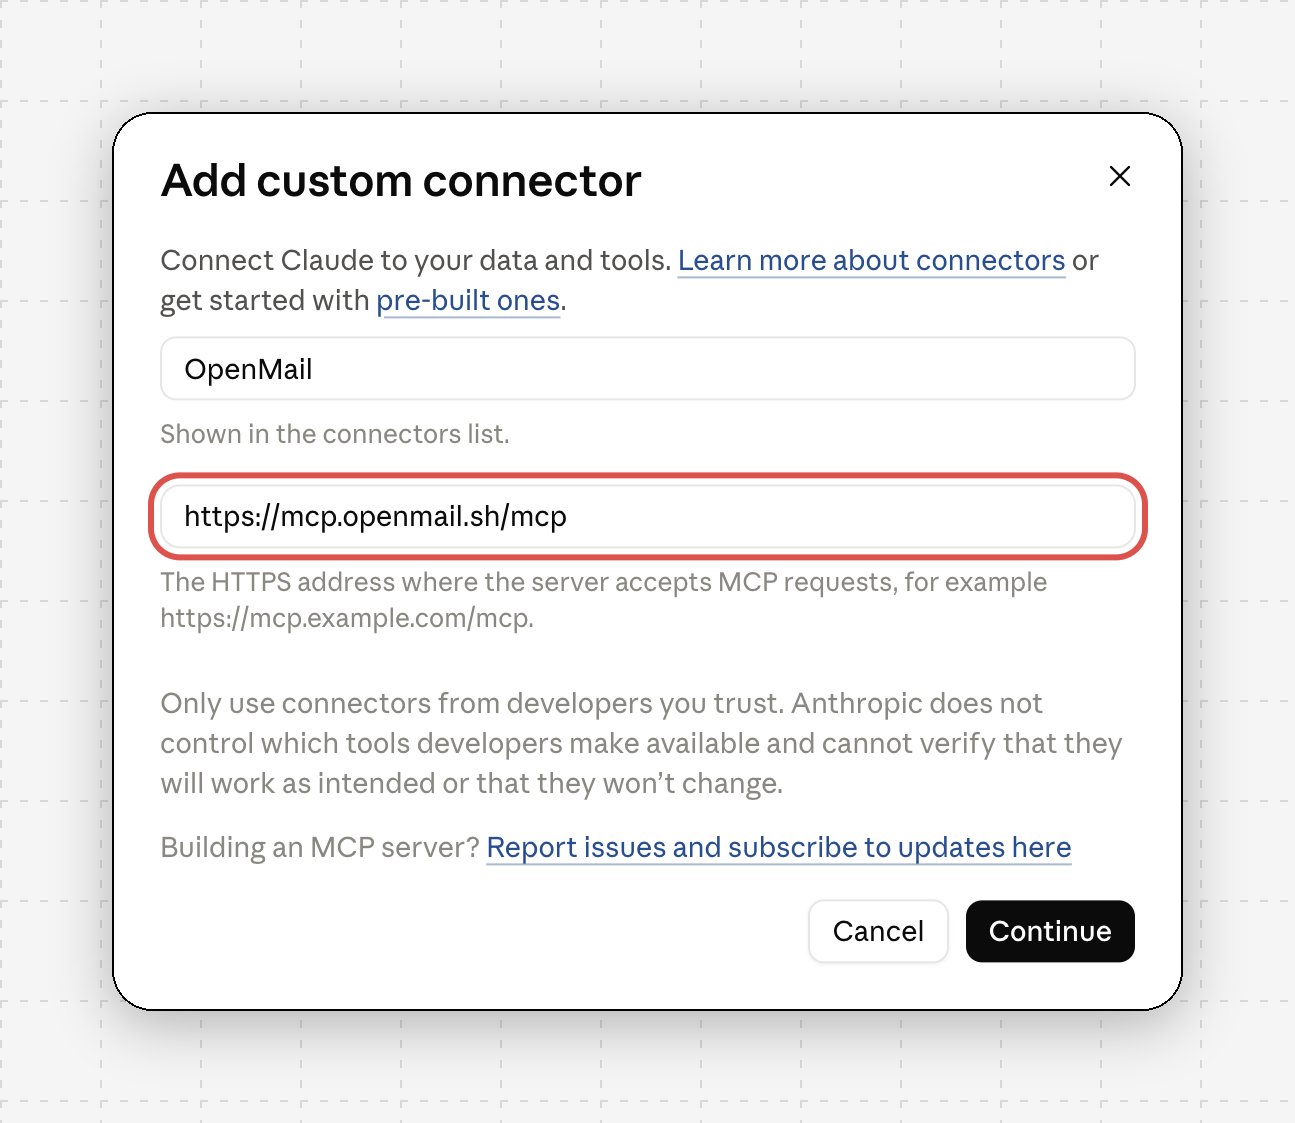
 | Field | Value |
| - | - |
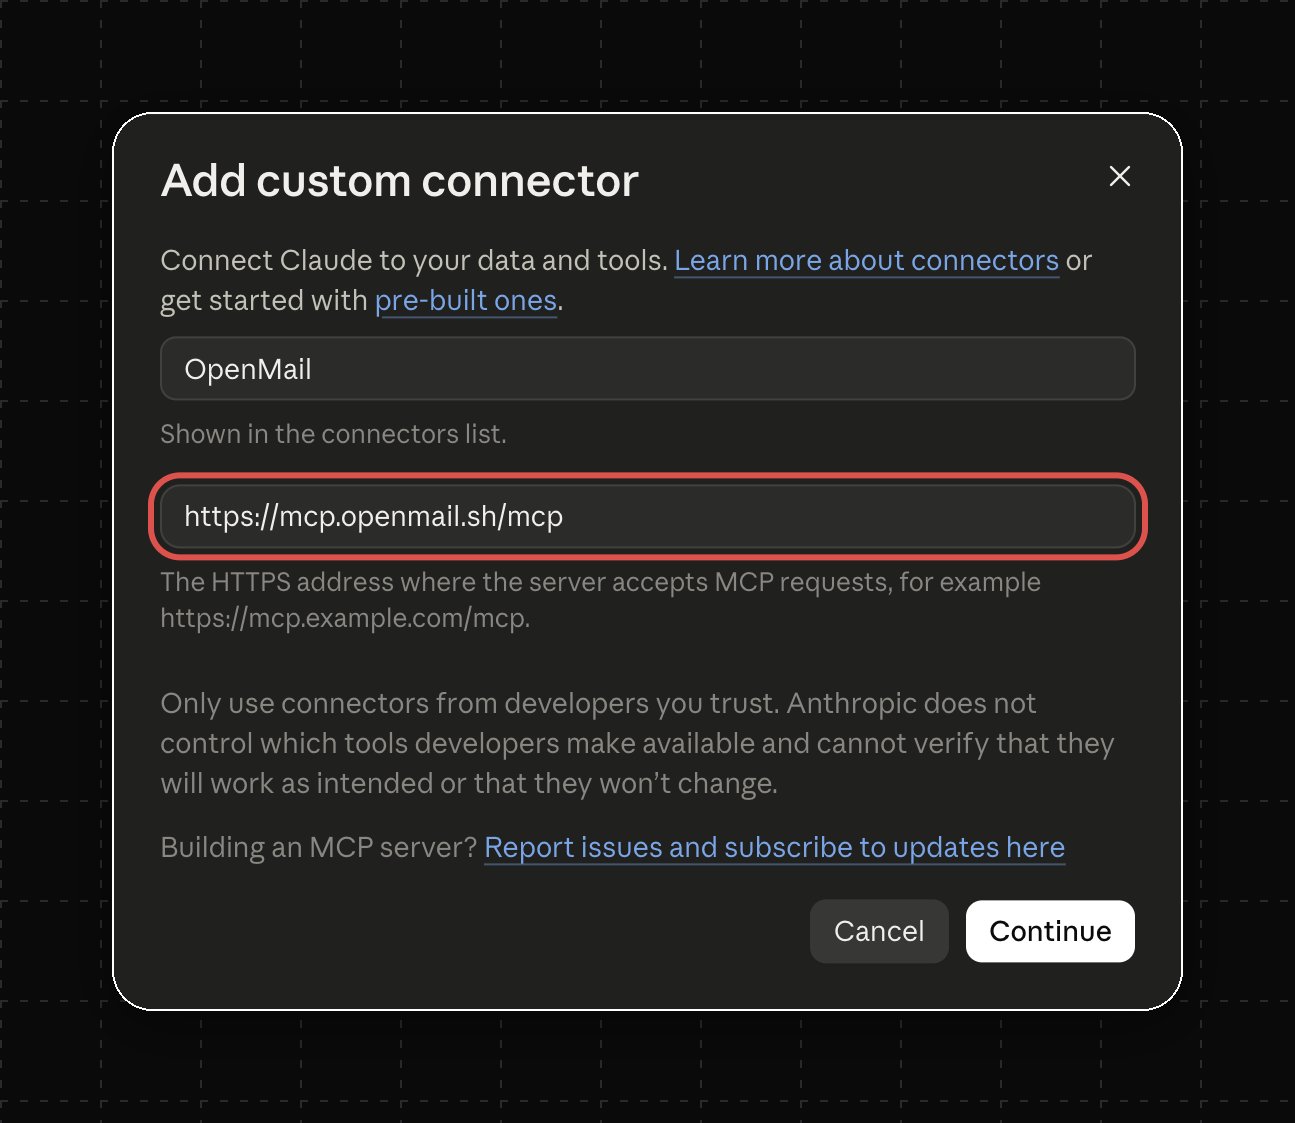
| Name | OpenMail |
| MCP server URL | `https://mcp.openmail.sh/mcp` |
Click **Continue**. Claude checks the URL and detects the sign-in settings.
| Field | Value |
| - | - |
| Name | OpenMail |
| MCP server URL | `https://mcp.openmail.sh/mcp` |
Click **Continue**. Claude checks the URL and detects the sign-in settings.
 | Field | Value |
| - | - |
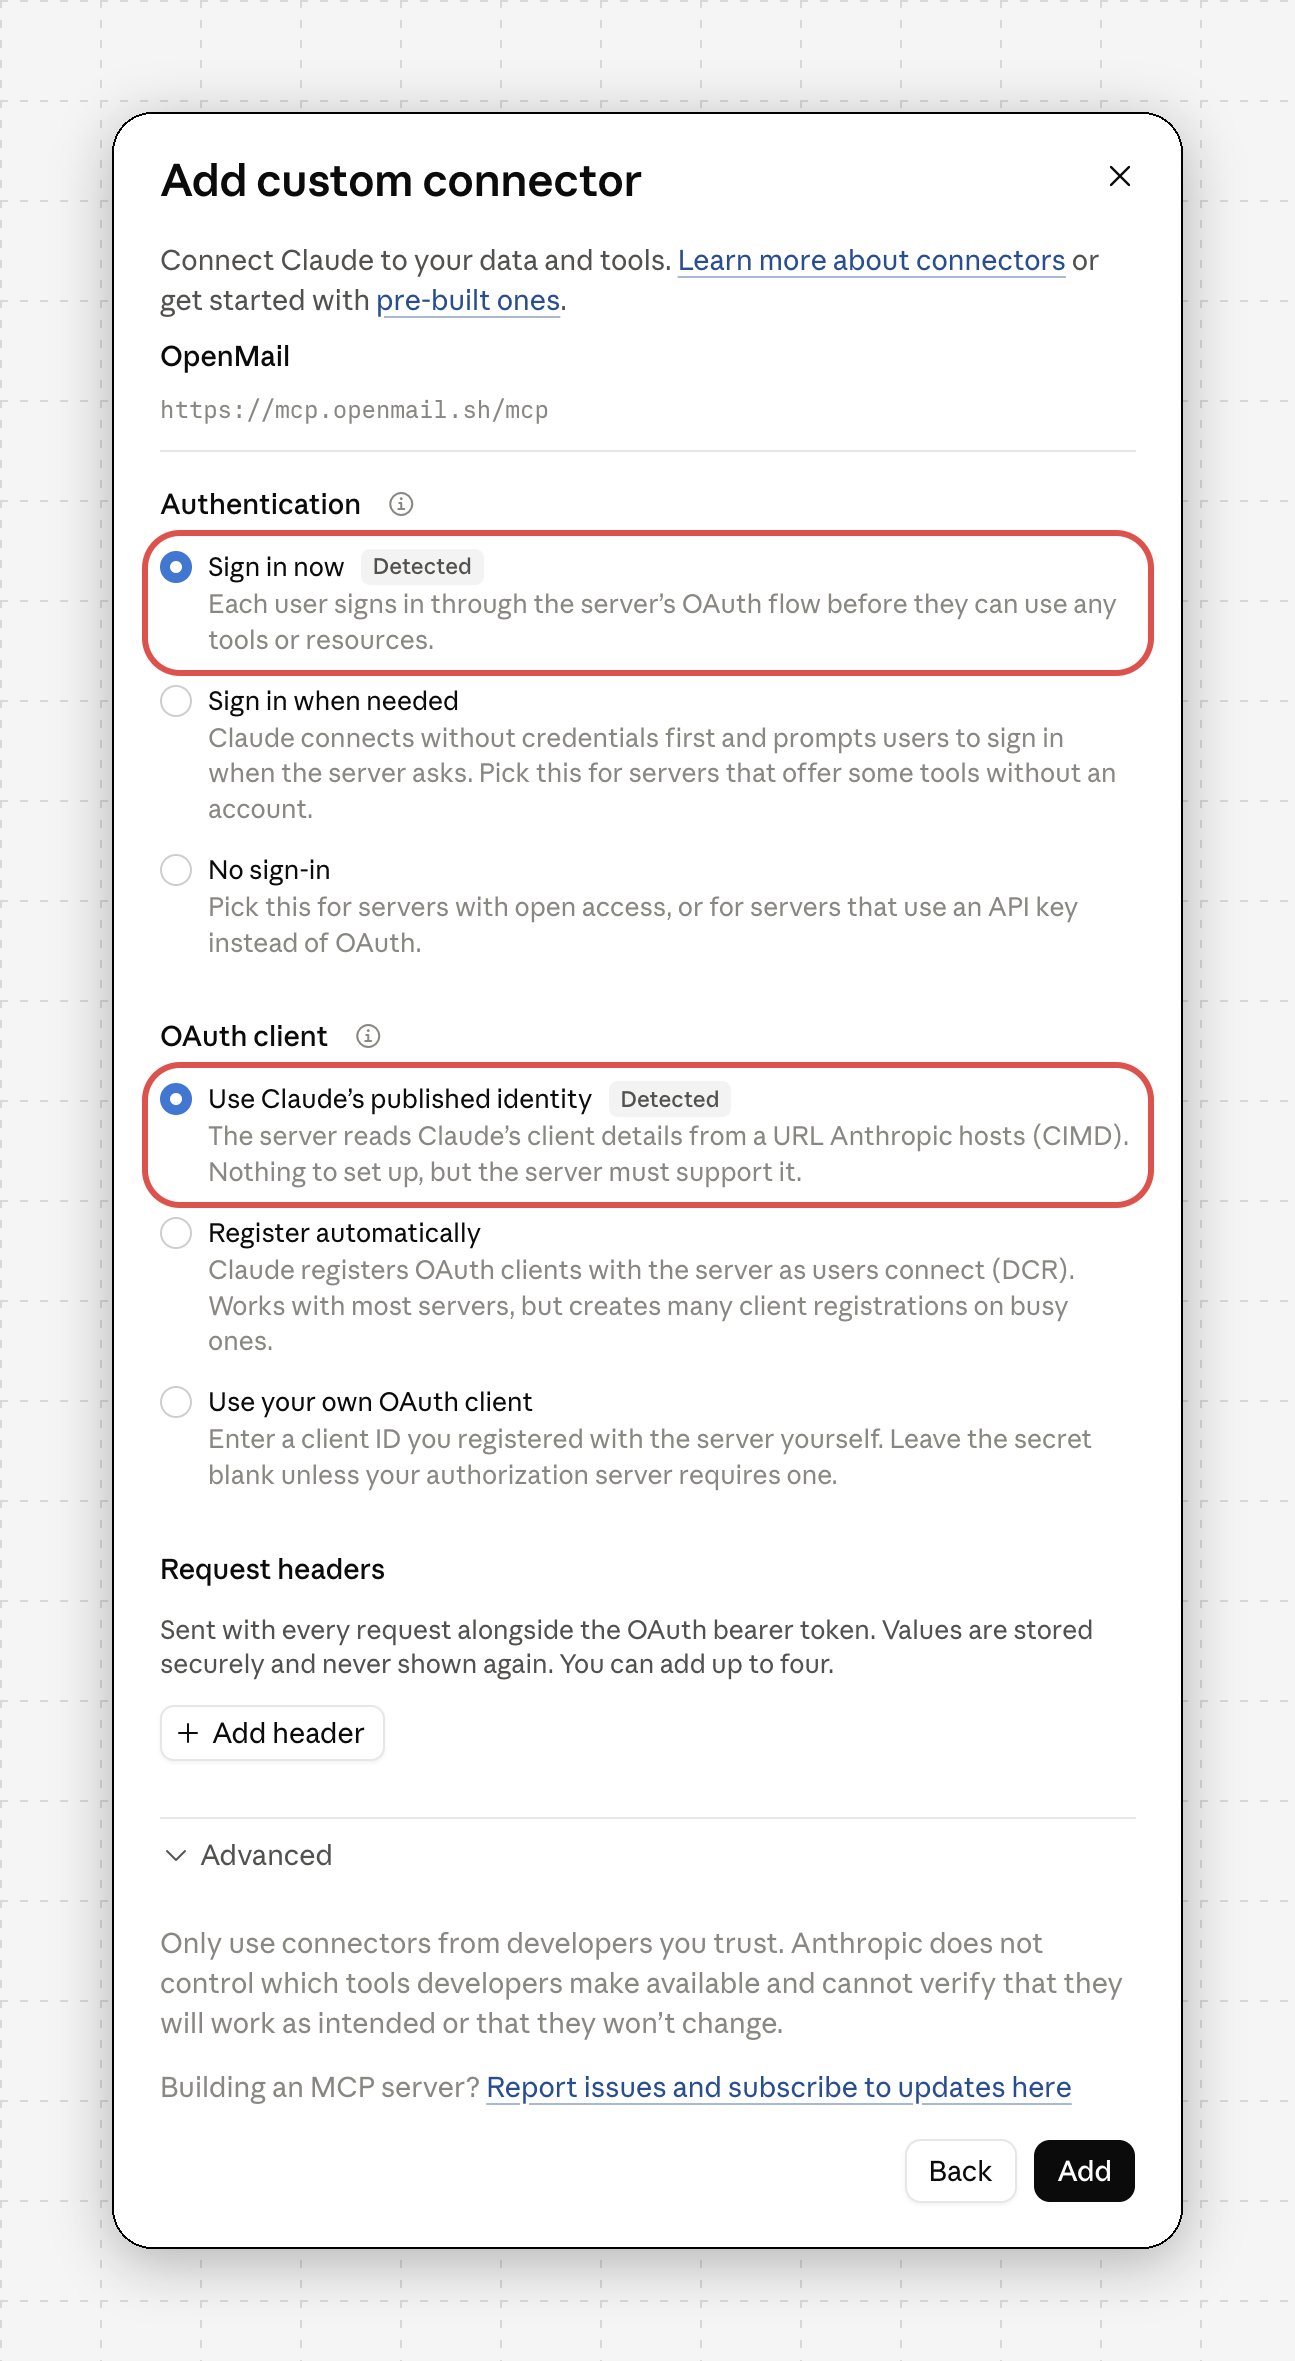
| Authentication | **Sign in now** |
| OAuth client | **Use Claude's published identity** (or **Register automatically**) |
| Request headers | none |
Both are pre-selected and marked **Detected**. Leave **Advanced** alone and click **Add**.
| Field | Value |
| - | - |
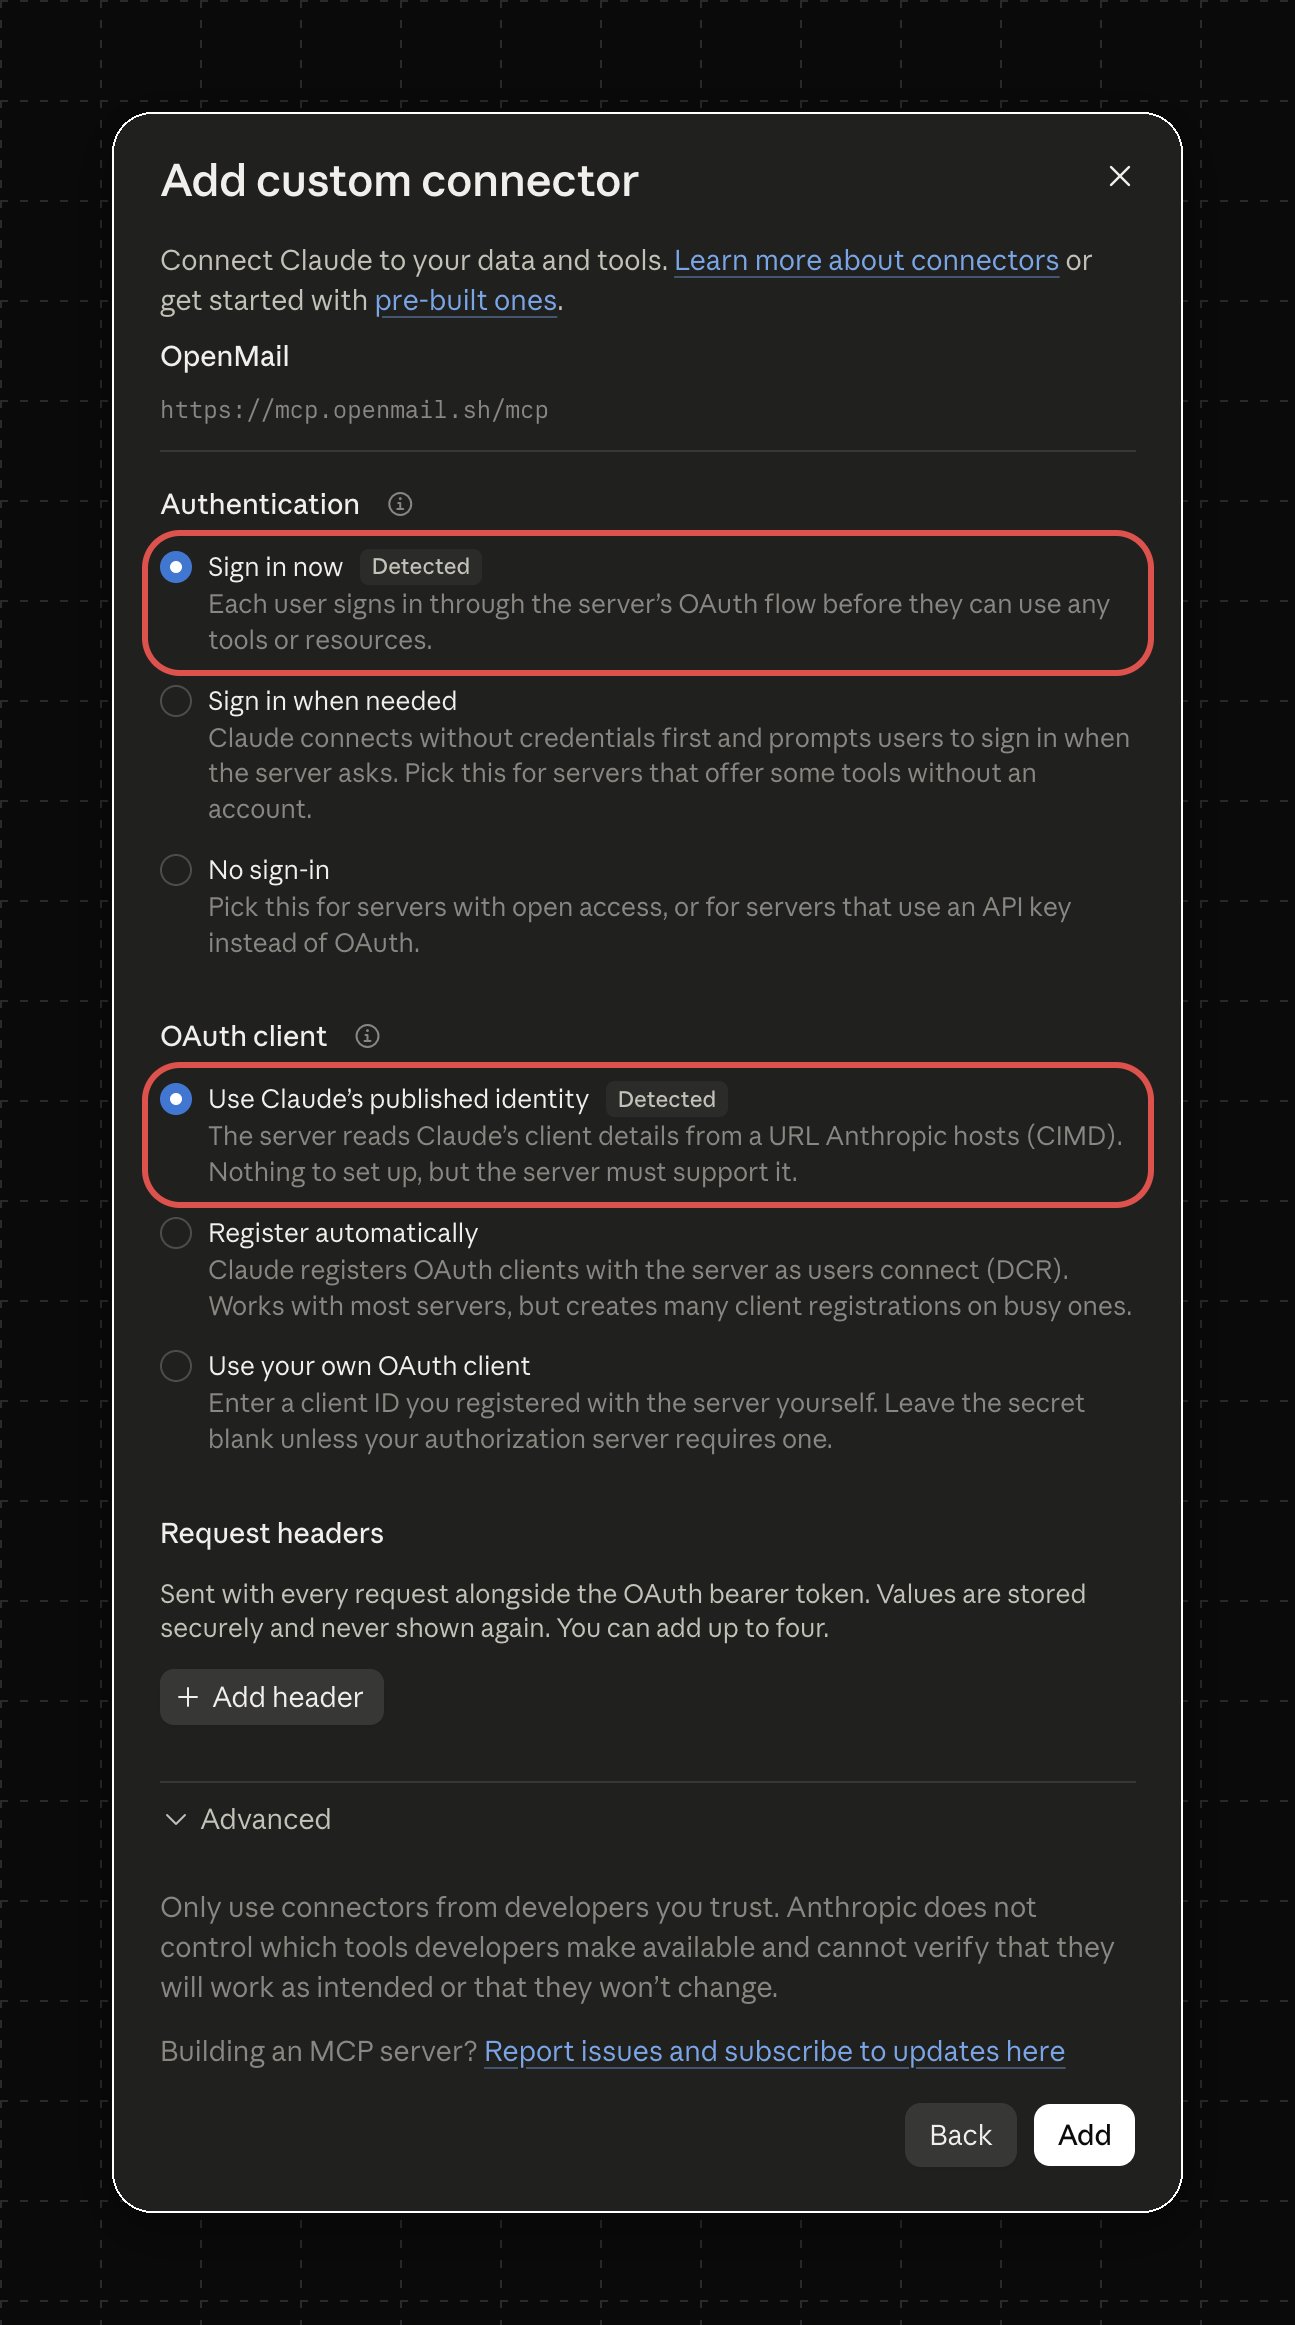
| Authentication | **Sign in now** |
| OAuth client | **Use Claude's published identity** (or **Register automatically**) |
| Request headers | none |
Both are pre-selected and marked **Detected**. Leave **Advanced** alone and click **Add**.
 The console opens and shows the client name and host. Pick an organisation if you belong to several. **Read** is always granted; untick **Send**, **Setup**, or **Domains** to withhold them. Revoke any time from [MCP settings](https://console.openmail.sh/settings/mcp).
Ask *"Which OpenMail inbox can you see?"*. Claude calls `auth_me` and answers with the organisation and inbox.
Custom connectors need a Claude Pro, Max, Team, or Enterprise plan.
```bash theme={"theme":{"light":"github-light","dark":"dark-plus"}}
claude mcp add --transport http openmail https://mcp.openmail.sh/mcp
```
Claude Code signs in with OAuth on first use. Connectors added on claude.ai do not carry over, so add it here too. Confirm with *"Which OpenMail inbox can you see?"*.
Prefer the CLI and skill? See [Claude Code](/integrations/claude-code).
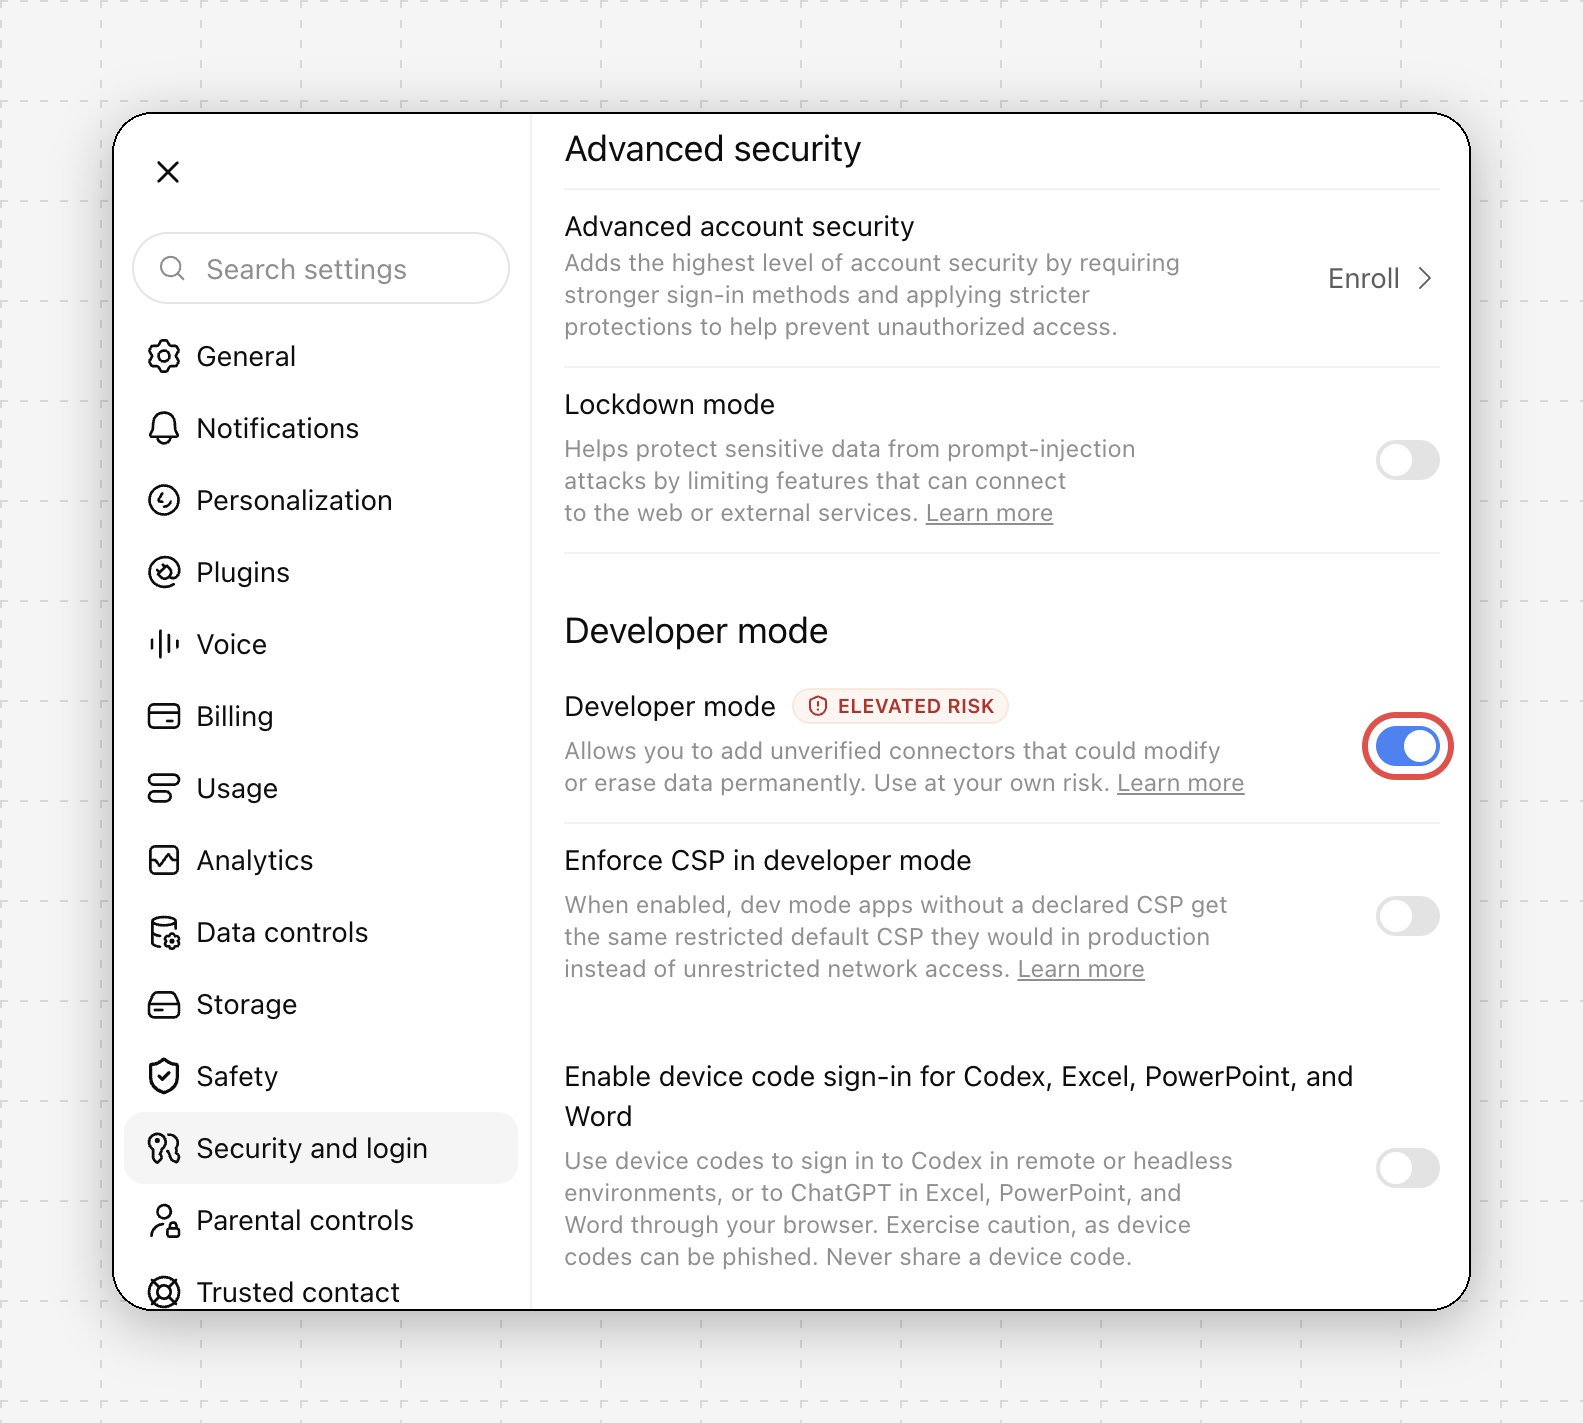
Go to **Settings → Security and login** and switch on **Developer mode**.
The console opens and shows the client name and host. Pick an organisation if you belong to several. **Read** is always granted; untick **Send**, **Setup**, or **Domains** to withhold them. Revoke any time from [MCP settings](https://console.openmail.sh/settings/mcp).
Ask *"Which OpenMail inbox can you see?"*. Claude calls `auth_me` and answers with the organisation and inbox.
Custom connectors need a Claude Pro, Max, Team, or Enterprise plan.
```bash theme={"theme":{"light":"github-light","dark":"dark-plus"}}
claude mcp add --transport http openmail https://mcp.openmail.sh/mcp
```
Claude Code signs in with OAuth on first use. Connectors added on claude.ai do not carry over, so add it here too. Confirm with *"Which OpenMail inbox can you see?"*.
Prefer the CLI and skill? See [Claude Code](/integrations/claude-code).
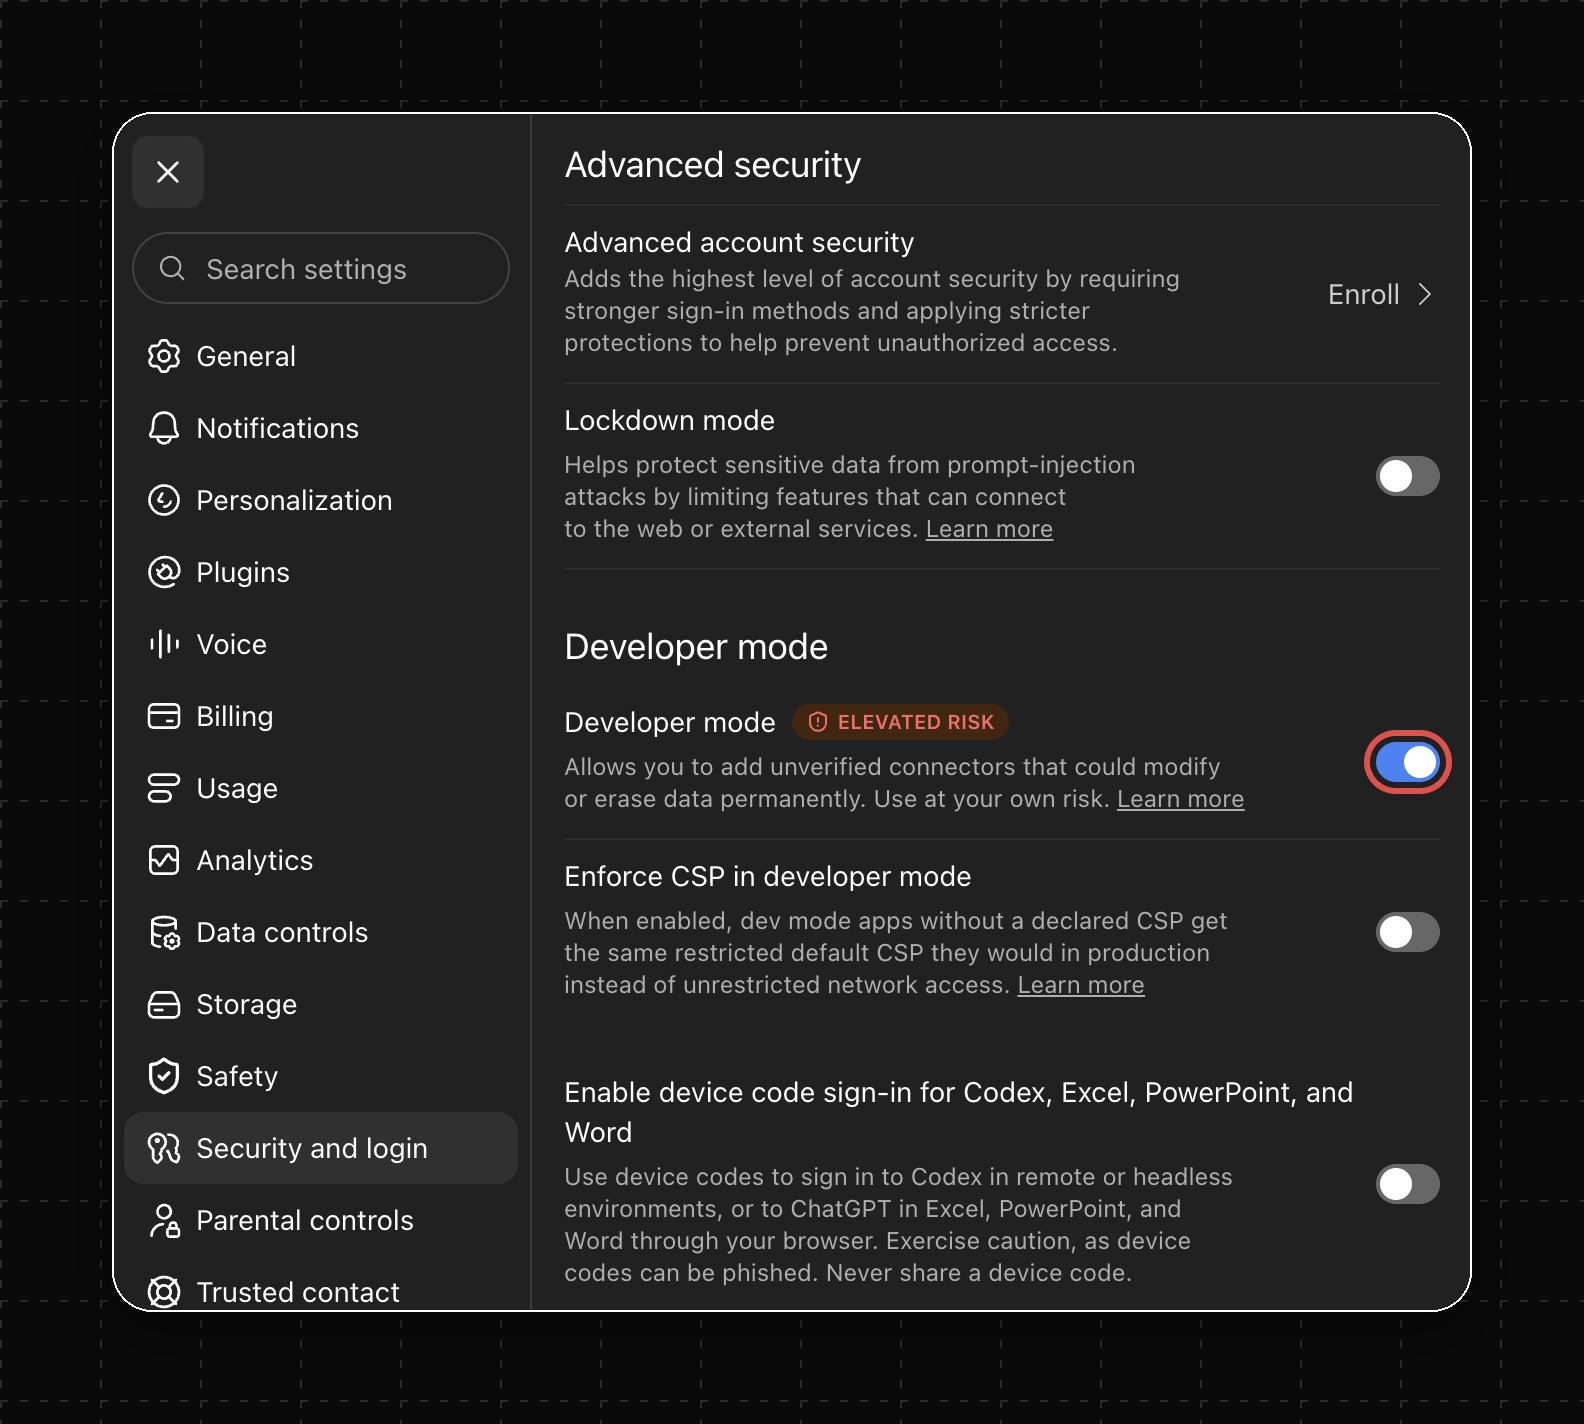
Go to **Settings → Security and login** and switch on **Developer mode**.
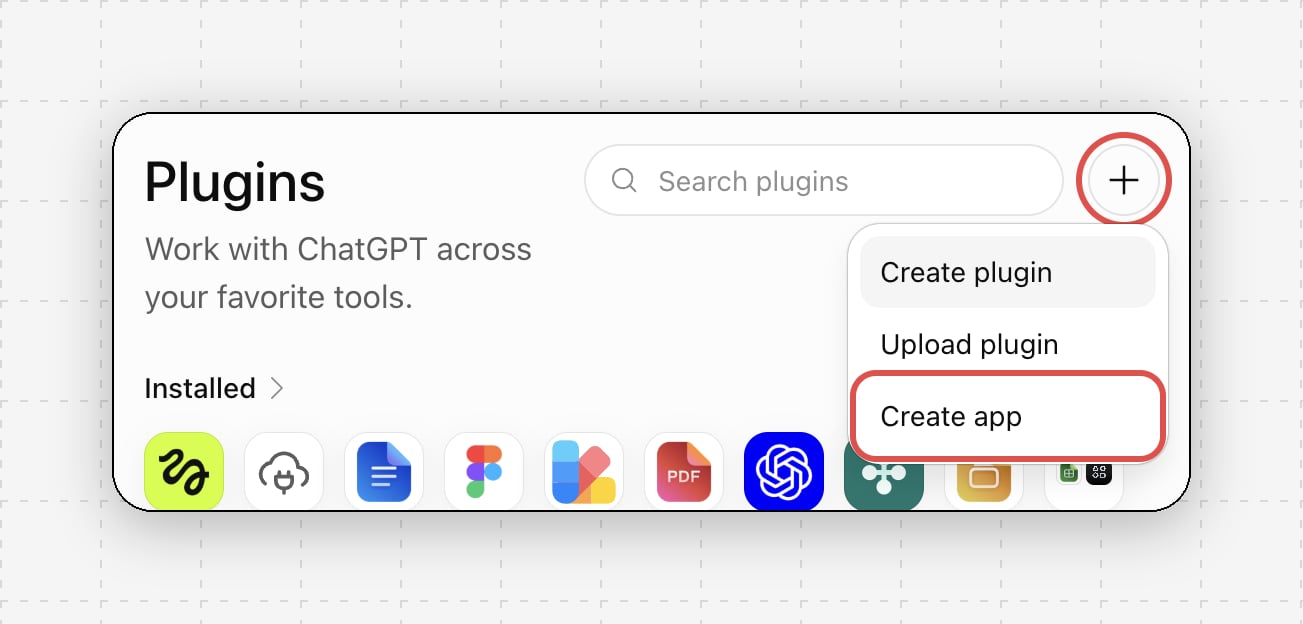
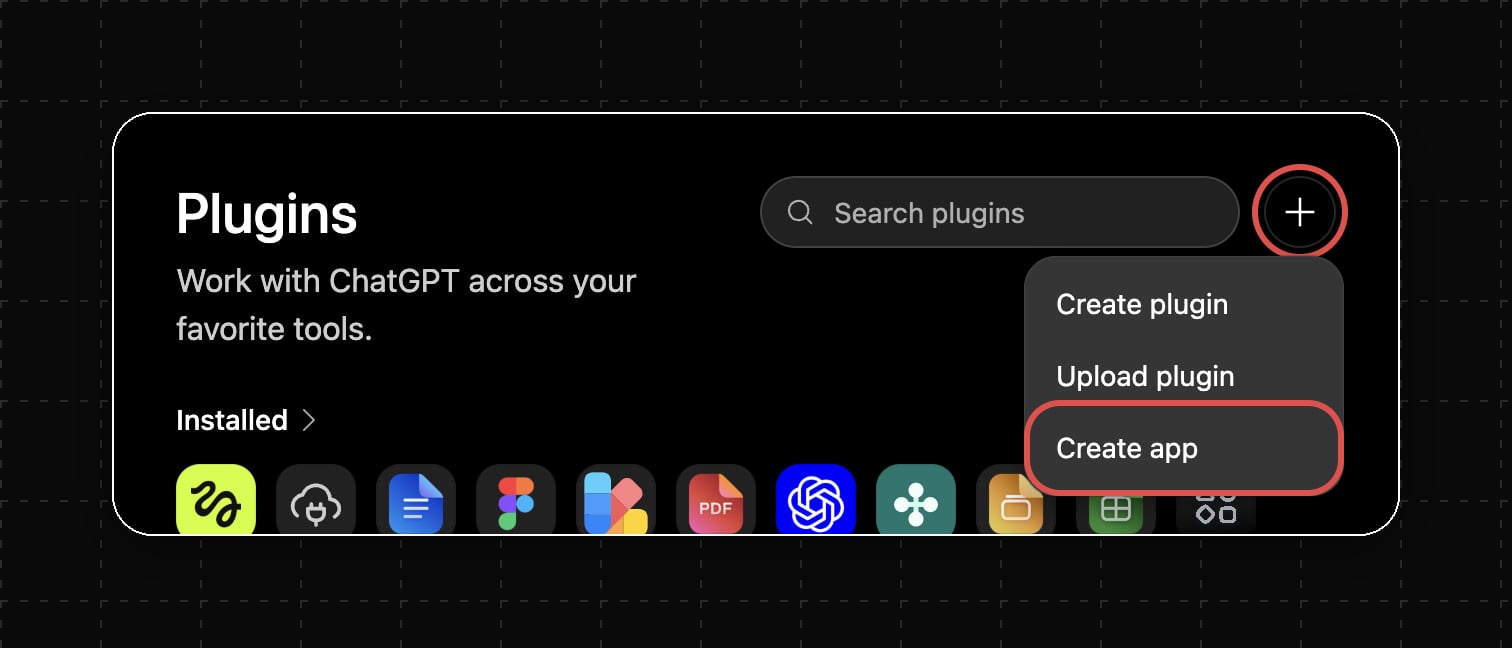
 Open **Plugins**, click **+** in the top right, then **Create app**.
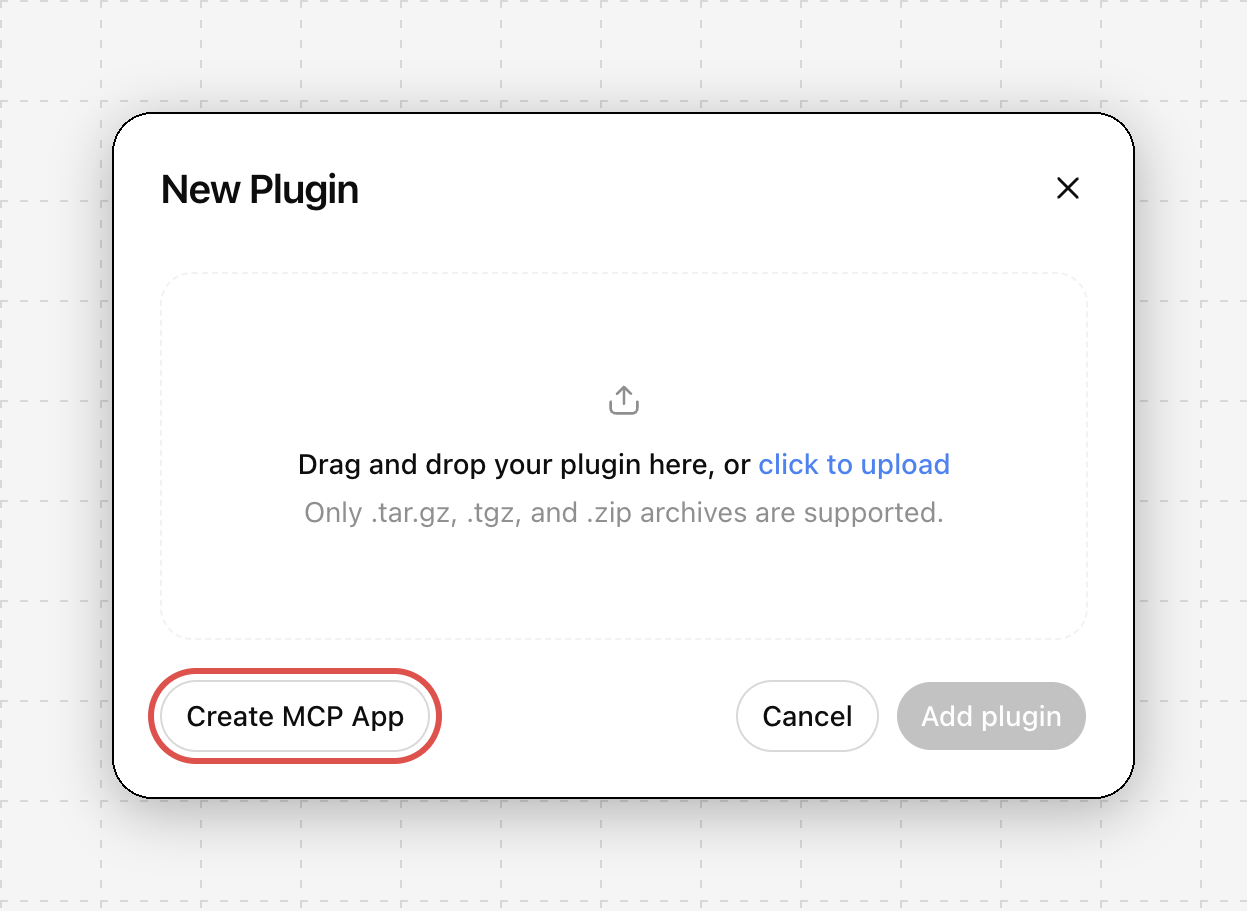
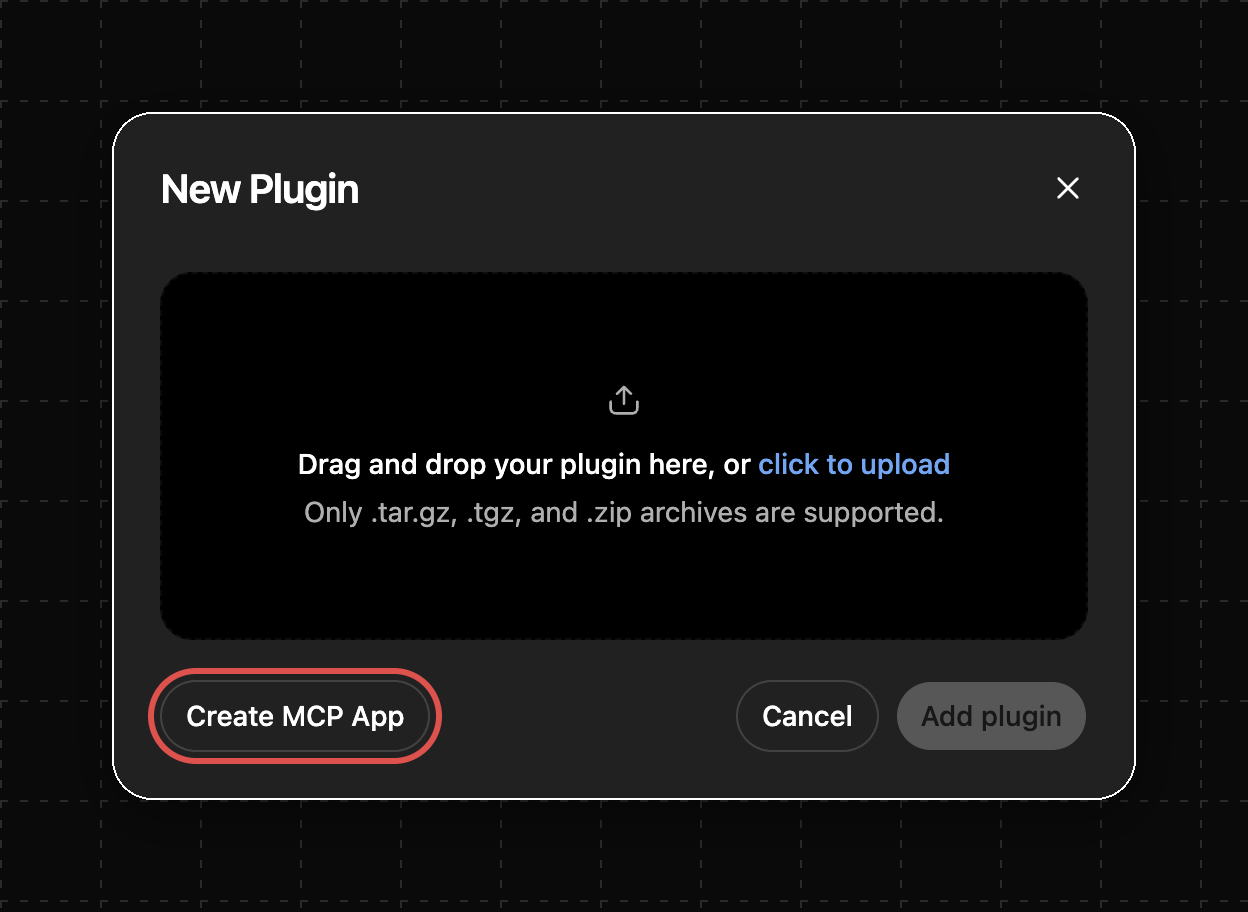
 In the dialog, click **Create MCP App**.
 | Field | Value |
| - | - |
| Name | OpenMail |
| Connection | **Server URL** → `https://mcp.openmail.sh/mcp` |
| Authentication | **OAuth** |
Leave **Advanced OAuth settings** alone; ChatGPT identifies itself, and the consent page shows `chatgpt.com` as the host. Tick the risk acknowledgement and click **Create**.
| Field | Value |
| - | - |
| Name | OpenMail |
| Connection | **Server URL** → `https://mcp.openmail.sh/mcp` |
| Authentication | **OAuth** |
Leave **Advanced OAuth settings** alone; ChatGPT identifies itself, and the consent page shows `chatgpt.com` as the host. Tick the risk acknowledgement and click **Create**.
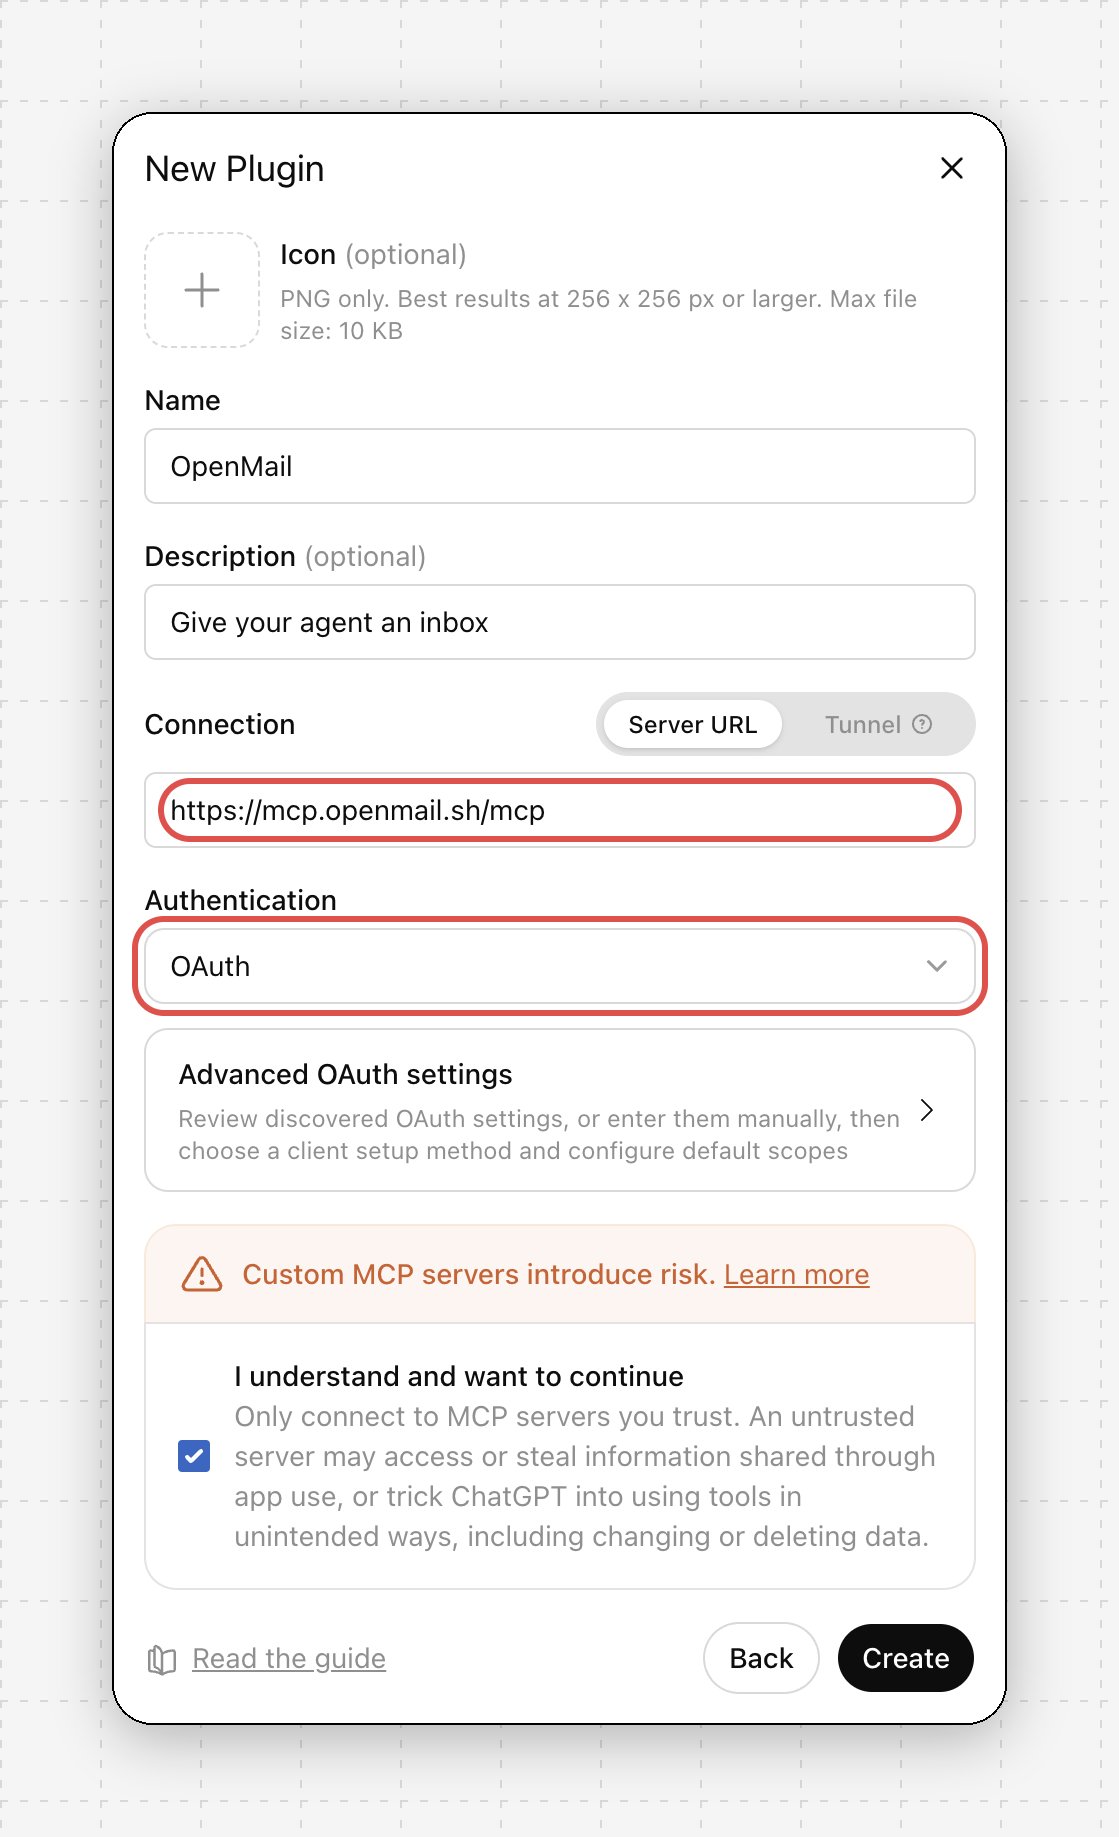
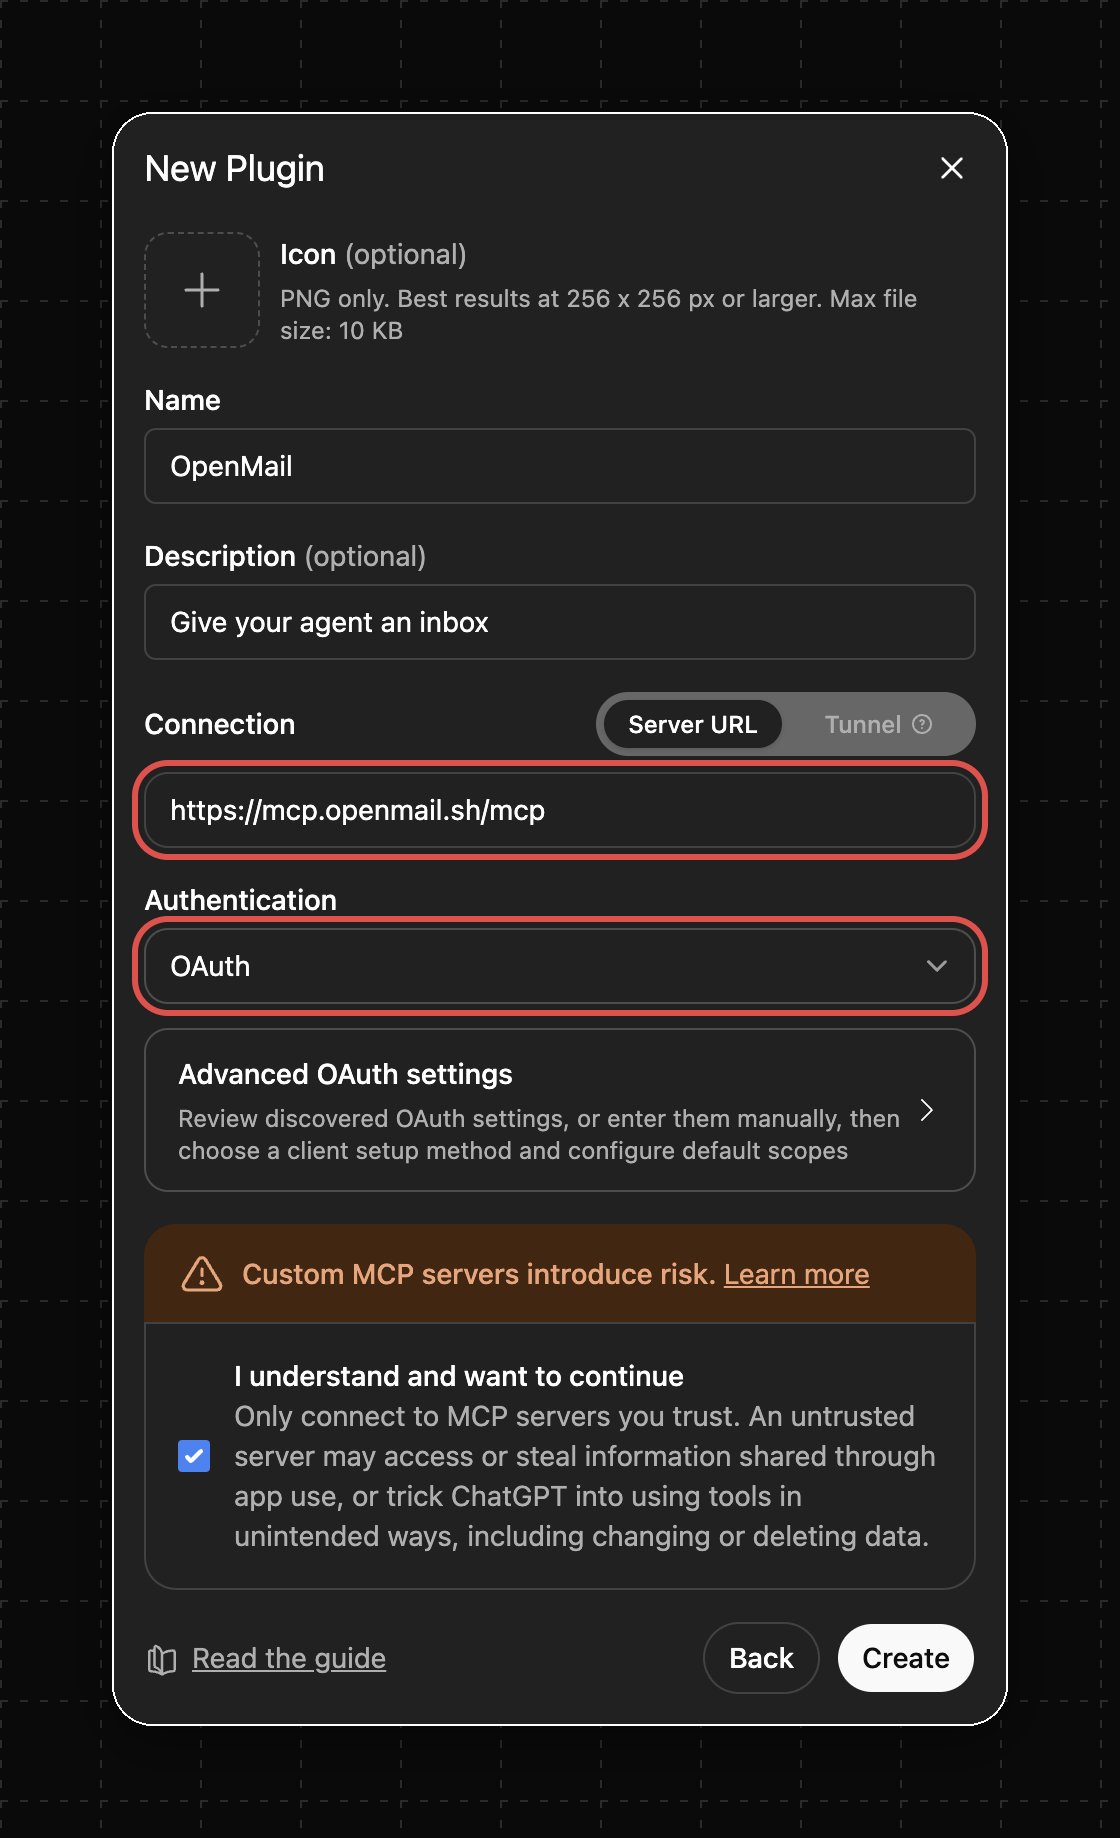 The console opens. Sign in, choose an organisation, and untick any scopes the agent should not have.
In a chat, open the **+** menu, choose **Developer mode**, and select **OpenMail**. Ask *"Which OpenMail inbox can you see?"*. ChatGPT asks before any write action, such as sending mail.
Developer mode is available on Plus, Pro, Business, Enterprise, and Edu plans.
Install the [OpenMail plugin](https://cursor.directory/plugins/openmail) from cursor.directory, or click once here and sign in when Cursor prompts you:
The console opens. Sign in, choose an organisation, and untick any scopes the agent should not have.
In a chat, open the **+** menu, choose **Developer mode**, and select **OpenMail**. Ask *"Which OpenMail inbox can you see?"*. ChatGPT asks before any write action, such as sending mail.
Developer mode is available on Plus, Pro, Business, Enterprise, and Edu plans.
Install the [OpenMail plugin](https://cursor.directory/plugins/openmail) from cursor.directory, or click once here and sign in when Cursor prompts you:

 Add OpenMail MCP server to Cursor
Or edit `.cursor/mcp.json` by hand. Drop `headers` for OAuth; keep it for a headless agent:
```json theme={"theme":{"light":"github-light","dark":"dark-plus"}}
{
"mcpServers": {
"openmail": {
"url": "https://mcp.openmail.sh/mcp",
"headers": { "Authorization": "Bearer om_YOUR_KEY" }
}
}
}
```
Use an inbox-scoped key, from the console or `openmail inbox keys create`. Keys go in the header, never the URL.
Confirm with *"Which OpenMail inbox can you see?"* in a Cursor chat.
OpenMail is in the [MCP Registry](https://registry.modelcontextprotocol.io) as `sh.openmail/openmail`. In VS Code, run **MCP: Add Server**, search for **OpenMail**, and sign in when prompted. Any registry-aware client installs it the same way.
Bridge with `mcp-remote`:
```json theme={"theme":{"light":"github-light","dark":"dark-plus"}}
{
"mcpServers": {
"openmail": {
"command": "npx",
"args": ["-y", "mcp-remote", "https://mcp.openmail.sh/mcp"]
}
}
}
```
Without a credential, `/mcp` answers `401` and your client starts sign-in. An agent that only needs these docs can use `https://mcp.openmail.sh/mcp/public`: no sign-in, just `search_docs` and `get_docs`.
## First run
Ask your agent: *"Set up an inbox for this agent and show me the address."*
It calls `setup_agent_email`, which shows a plan first. Confirm, and it creates the inbox. Over OAuth no key is minted; the session already has access, and the tool points to the console if another agent needs one. Over an API key, a new inbox-scoped key appears once in the result.
Move that key to the agent's environment now. If the transcript is shared, revoke it in the console.
## Tools
19 tools. Your client reads the live list from the server; this table can lag a release.
| Tool | What it does |
| - | - |
| `search_docs`, `get_docs` | Search and read these docs. Also available without sign-in at `/mcp/public`. |
| `auth_me` | Which organisation and inbox this credential can see. |
| `setup_agent_email` | Plan, then create an inbox and mint a scoped key. |
| `list_inboxes`, `get_inbox`, `create_inbox`, `mint_inbox_key` | Inbox management. |
| `list_unread_threads` | Unread threads whose latest message is `autoReplyable`: sent by a person or another agent. Spam, marketing, bounces, and machine-generated mail (no-reply, OTPs, receipts) are filtered out. |
| `read_thread` | Full thread as Markdown with timestamps, `autoReplyable` flags, and attachment message ids. Quoted reply history is stripped. |
| `reply_to_thread`, `send_email` | Reply in-thread, or start a new one. `send_email` names the inbox it used when you did not pass `inbox_id`. |
| `mark_thread_read` | Mark a thread handled. |
| `get_attachment_text` | Extracted text from an attachment. Use the `message:` id shown in `read_thread`. |
| `list_domains`, `add_domain`, `get_domain`, `verify_domain` | Custom domains with pasteable DNS records. Pro plan. |
| `send_mcp_feedback` | Report a confusing or broken tool to the OpenMail team. |
Tools follow the credential. An inbox-scoped key hides `list_inboxes`, `setup_agent_email`, and the domain tools.
## Narrow what the agent can do
| Goal | URL |
| - | - |
| Read only, no sending | `https://mcp.openmail.sh/mcp/readonly` or `?readonly=true` |
| One inbox, no discovery | `https://mcp.openmail.sh/mcp/inbox/INBOX_ID` |
| Fewer tools | `?toolsets=mailbox,docs` or the `X-MCP-Toolsets` header |
## What the connected client can do
A connected client sees whatever the tools return: thread contents, attachment text, inbox addresses. With **Send** it can also send and reply as your inbox. That data falls under the client's own terms, so connect only clients you trust and untick scopes the agent does not need. Revoking the connection in [MCP settings](https://console.openmail.sh/settings/mcp), or its API key, stops access at once.
## Usage analytics
The server records how tools are used so the OpenMail team can fix the ones that fail or confuse agents. Each tool accepts an optional `context` argument: one line from the agent on what it is trying to do. That line is recorded too.
| Recorded | Never recorded |
| - | - |
| Tool name, success or failure, latency | Message bodies, subjects, recipients |
| Client name and version (Claude, Cursor, ChatGPT) | Attachment text |
| The agent's `context` line | Inbox names and display names |
| Your organisation id | API keys and OAuth tokens |
Tool results never leave the server, except from `search_docs` and `get_docs`, which return public documentation.
## Troubleshooting
Sign up at [console.openmail.sh](https://console.openmail.sh/signup), then connect again from your client.
Revoke it in [MCP settings](https://console.openmail.sh/settings/mcp) and connect again. The consent page shows the picker each time.
Check the key starts with `om_`, is complete, and is not revoked. It belongs in the `Authorization: Bearer` header, not the URL. A leftover `om_YOUR_KEY` placeholder in Cursor gives the same error.
An inbox-scoped key hides `list_inboxes`, `setup_agent_email`, and the domain tools on purpose. After changing scopes, disconnect and reconnect so the client reloads the list.
Check **Settings → Connectors** shows OpenMail as connected. If not, repeat the Claude steps.
## Example prompts
* Set up an inbox for this agent and show me the address.
* Reply to my unread mail.
* Read the invoice attached to the latest thread and summarise it.
* Add and verify `mail.example.com`.
## Related
* [Claude Code](/integrations/claude-code): CLI and skill instead of MCP
* [Agent keys](/best-practices/api-key-scopes): why inbox-scoped keys
* Source: [openmailsh/mcp](https://github.com/openmailsh/mcp) (MIT)
This documentation is built and hosted on [Mintlify](https://mintlify.com), a developer documentation platform.
Add OpenMail MCP server to Cursor
Or edit `.cursor/mcp.json` by hand. Drop `headers` for OAuth; keep it for a headless agent:
```json theme={"theme":{"light":"github-light","dark":"dark-plus"}}
{
"mcpServers": {
"openmail": {
"url": "https://mcp.openmail.sh/mcp",
"headers": { "Authorization": "Bearer om_YOUR_KEY" }
}
}
}
```
Use an inbox-scoped key, from the console or `openmail inbox keys create`. Keys go in the header, never the URL.
Confirm with *"Which OpenMail inbox can you see?"* in a Cursor chat.
OpenMail is in the [MCP Registry](https://registry.modelcontextprotocol.io) as `sh.openmail/openmail`. In VS Code, run **MCP: Add Server**, search for **OpenMail**, and sign in when prompted. Any registry-aware client installs it the same way.
Bridge with `mcp-remote`:
```json theme={"theme":{"light":"github-light","dark":"dark-plus"}}
{
"mcpServers": {
"openmail": {
"command": "npx",
"args": ["-y", "mcp-remote", "https://mcp.openmail.sh/mcp"]
}
}
}
```
Without a credential, `/mcp` answers `401` and your client starts sign-in. An agent that only needs these docs can use `https://mcp.openmail.sh/mcp/public`: no sign-in, just `search_docs` and `get_docs`.
## First run
Ask your agent: *"Set up an inbox for this agent and show me the address."*
It calls `setup_agent_email`, which shows a plan first. Confirm, and it creates the inbox. Over OAuth no key is minted; the session already has access, and the tool points to the console if another agent needs one. Over an API key, a new inbox-scoped key appears once in the result.
Move that key to the agent's environment now. If the transcript is shared, revoke it in the console.
## Tools
19 tools. Your client reads the live list from the server; this table can lag a release.
| Tool | What it does |
| - | - |
| `search_docs`, `get_docs` | Search and read these docs. Also available without sign-in at `/mcp/public`. |
| `auth_me` | Which organisation and inbox this credential can see. |
| `setup_agent_email` | Plan, then create an inbox and mint a scoped key. |
| `list_inboxes`, `get_inbox`, `create_inbox`, `mint_inbox_key` | Inbox management. |
| `list_unread_threads` | Unread threads whose latest message is `autoReplyable`: sent by a person or another agent. Spam, marketing, bounces, and machine-generated mail (no-reply, OTPs, receipts) are filtered out. |
| `read_thread` | Full thread as Markdown with timestamps, `autoReplyable` flags, and attachment message ids. Quoted reply history is stripped. |
| `reply_to_thread`, `send_email` | Reply in-thread, or start a new one. `send_email` names the inbox it used when you did not pass `inbox_id`. |
| `mark_thread_read` | Mark a thread handled. |
| `get_attachment_text` | Extracted text from an attachment. Use the `message:` id shown in `read_thread`. |
| `list_domains`, `add_domain`, `get_domain`, `verify_domain` | Custom domains with pasteable DNS records. Pro plan. |
| `send_mcp_feedback` | Report a confusing or broken tool to the OpenMail team. |
Tools follow the credential. An inbox-scoped key hides `list_inboxes`, `setup_agent_email`, and the domain tools.
## Narrow what the agent can do
| Goal | URL |
| - | - |
| Read only, no sending | `https://mcp.openmail.sh/mcp/readonly` or `?readonly=true` |
| One inbox, no discovery | `https://mcp.openmail.sh/mcp/inbox/INBOX_ID` |
| Fewer tools | `?toolsets=mailbox,docs` or the `X-MCP-Toolsets` header |
## What the connected client can do
A connected client sees whatever the tools return: thread contents, attachment text, inbox addresses. With **Send** it can also send and reply as your inbox. That data falls under the client's own terms, so connect only clients you trust and untick scopes the agent does not need. Revoking the connection in [MCP settings](https://console.openmail.sh/settings/mcp), or its API key, stops access at once.
## Usage analytics
The server records how tools are used so the OpenMail team can fix the ones that fail or confuse agents. Each tool accepts an optional `context` argument: one line from the agent on what it is trying to do. That line is recorded too.
| Recorded | Never recorded |
| - | - |
| Tool name, success or failure, latency | Message bodies, subjects, recipients |
| Client name and version (Claude, Cursor, ChatGPT) | Attachment text |
| The agent's `context` line | Inbox names and display names |
| Your organisation id | API keys and OAuth tokens |
Tool results never leave the server, except from `search_docs` and `get_docs`, which return public documentation.
## Troubleshooting
Sign up at [console.openmail.sh](https://console.openmail.sh/signup), then connect again from your client.
Revoke it in [MCP settings](https://console.openmail.sh/settings/mcp) and connect again. The consent page shows the picker each time.
Check the key starts with `om_`, is complete, and is not revoked. It belongs in the `Authorization: Bearer` header, not the URL. A leftover `om_YOUR_KEY` placeholder in Cursor gives the same error.
An inbox-scoped key hides `list_inboxes`, `setup_agent_email`, and the domain tools on purpose. After changing scopes, disconnect and reconnect so the client reloads the list.
Check **Settings → Connectors** shows OpenMail as connected. If not, repeat the Claude steps.
## Example prompts
* Set up an inbox for this agent and show me the address.
* Reply to my unread mail.
* Read the invoice attached to the latest thread and summarise it.
* Add and verify `mail.example.com`.
## Related
* [Claude Code](/integrations/claude-code): CLI and skill instead of MCP
* [Agent keys](/best-practices/api-key-scopes): why inbox-scoped keys
* Source: [openmailsh/mcp](https://github.com/openmailsh/mcp) (MIT)
This documentation is built and hosted on [Mintlify](https://mintlify.com), a developer documentation platform.